Susan's Designs » Drapery & Home Decorating

Masthead header
Susan's Designs bio picture
  • nesting creatively

    Welcome to my showcase of design ideas and inspiration for custom home décor, flattering window treatments and other soft furnishings. I have been blessed by being invited into many beautiful homes and meeting the nicest people. I am among the fortunate few who truly enjoy a fulfilling and rewarding profession. Thank you for looking at my work.

If you are like many small drapery workrooms, you do it all from designing to fabricating and installing.  Installation does not have to be a daunting task though, with some careful planning, some knowhow and the right tools of the trade just about any size of window treatment can be put up by an individual.

The biggest problem when installing by yourself is how to handle very large treatments.  Take large board mounts for instance; one of the easiest ways I’ve found to overcome difficulties is to attach the window treatment with hook and loop tape to the board.  I staple the hook side to the board and the loop side to the fabric.  The loop side is a softer texture and will not harm the fabric when handled or washed.  This way the boards can be mounted on the wall separately, eliminating any excess weight of the fabric.  First I mount all my L-brackets using the largest size I can considering the projection of the board.  I like to install a bracket every two to three feet.  I then place the board on top of the brackets (because I use a large size bracket the board will sit on it like a shelf without the threat of falling down) and screw it into place.  If there is some concern about the board slipping before it is screwed into place double sided carpet tape can be used on each bracket to hold the board in place.  Once the board is securely installed, the window treatment just needs to be stuck on using the hook and loop tape.  (I call these peel and stick treatments)

Long traverse rods can present a problem also.  First of all, install all the brackets.  Use all of the center supports that come with the rod for the best stability.  Next using a short piece of cord or picture wire (both are a must in your tool box) string the cord through a hole in the end of the rod.  Tie the cord in a knot and make a loop about four inches in diameter and place this loop over the end bracket.  This end of the rod will just hang loosely under the bracket.  Then go to the other side of the window and swing the other end of the rod up and pop it into the bracket.  Return to the end with the cord loop, remove the cored and pop that end into the bracket.  Now you can lock-in the center supports and continue with your installation

This method can be used for any long rod, be it 2.5”, wood, metal etc.

A great trick to installing all the brackets at the same level is to install the two outside end brackets first and using a thin cord or string, attach the string to one end bracket and pull it across to the other end bracket keeping it pulled tightly against the wall.  This gives you a plumb line for installing the other brackets.  Often when measuring from the ceiling down or from the floor up it’s not even, and the brackets will not line up.

Of course once in a while the window is such that you may need to hire an installation assistant but for the most part by planning ahead, the job should go up with ease.

Let me know if you have any helpful tips of your own?

  • RobertJuly 22, 2011 - 11:46 am

    some pretty good stuff here.

Cornice

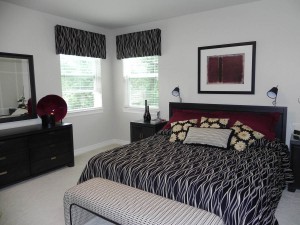
These cornice boards are perfect for this master bedroom’s contemporary design.
The clean, straight lines of the window treatment are hung close to the ceiling and bring balance to the room both in color and form.
The cornices were made from two long scraps of fabric left over from the bedspread that were 15″ wide and three yards long.  The boards were generously padded to add fullness and depth.
Because of the wavy pattern on the fabric, the strips could be sewn together without the need to match them yet they still look continuous.
Two inch wood blinds are mounted inside the window frame for privacy.
Toss pillows of coordinating fabrics adorn the bed and add contrast color and texture.
It was a wonderful way to use up the left over fabric and tie the window treatments in with the rest of the room.

What is your window style?

First of all we should look at some types of windows.  Most homes have fixed windows meaning that they cannot be opened.   Another common window is a casement, which is hinged to swing open and shut.  Double hung windows are also common and they can be operated by sliding one half of the window up or down.  Often a large fixed picture window is flanked with smaller windows that are not fixed such as casements or double hung.  These can be Palladian style, which means a group of three windows with an arch over the center.  This is a very classical window and often visually dominates the room.  It can also be a bay window with the difference being that the two outer windows are set at an angle creating an alcove, a great spot for a cozy nook.  Most of our homes today incorporate these windows into their architecture.

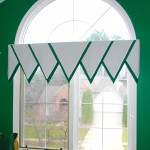
banner valance, Zuzie Q a Susan

Casement window is topped with a banner valance for that Michigan Sate fan

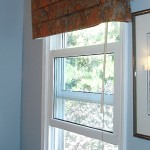
roman valance, Zuzie Q a Susan

This double hung window has a roman valance over it.

There are also a variety of specialty windows such as clerestory type, a strip of horizontal panes set high up on a wall near the ceiling and jalousie, a window that has horizontal slats that open louver style.  There are portholes, skylights, elliptical and oval windows, not to mention triangular or trapezoid windows.

triangular window, Zuzie Q a Susan

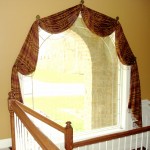
Triangular, cathedral window. Floor to ceiling panels  accentuate the height of the room and unify the windows.

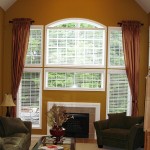
Palladian window, Zuzie Q a Susan

Palladian window flanked with side panels

fixed window, Zuzie Q a Susan

Fixed window, adorned with a scarf style swag

When choosing window treatments the space around the window should be taken into consideration.  Is it in a corner, on either side of a fireplace, are there chair or crown moldings?  What are the proportions; are the ceilings low or perhaps high?  What is the scale of the window, the size or the line and balance?  What about it’s visual weight?  A window is tied to a room both architecturally and visually.

Window treatments can enhance certain architectural details or cover them up if needed.  They can broaden the area and add height to windows that are too small for the space yet downplay and simplify a large window.

Window function also plays a big roll in decorating.  In which direction does it open, does it slide on a track?  Where is the crank or the handle located and how much does it protrude?  These items may not seem to significant but drapery panels can get caught in the track of sliding doors and roman shades or blinds can get hung up on cranks and handles.  Ease of use and function are very important when choosing window treatments.

vintage bedroom, Zuzie Q, a Susan

Zuzie Q, a Susan’s Drapery Design

This homeowner had a gorgeous moire, powder blue vintage bedspread and wanted to keep it as the center piece of the bedroom.
We were able to find the matching moire blue fabric to cover the drapery rods to tie in the bedspread and swaged them with a beautiful floral.
A matching gathered dust ruffle and some upholstery pieces in the same floral finished off the room.

Zuzie Q, a Susan

Zuzie Q, a Susan’s Drapery Design

This small kitchen window needed some tender loving care.
No privacy was needed and there was a beautiful garden view yet the window looked bare from the inside.
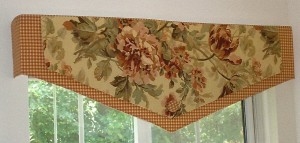
This window treatment was created, no fuss/no muss, a simple, flat banner type valance using two coordinating fabrics,
a covered button and some piping.
It was mounted to the wall a few inches above the window on a board and attached with hook and loop tape.

Related Posts Plugin for WordPress, Blogger...