Susan's Designs » Drapery & Home Decorating

Masthead header
Susan's Designs bio picture
  • nesting creatively

    Welcome to my showcase of design ideas and inspiration for custom home décor, flattering window treatments and other soft furnishings. I have been blessed by being invited into many beautiful homes and meeting the nicest people. I am among the fortunate few who truly enjoy a fulfilling and rewarding profession. Thank you for looking at my work.


rod pocket, Zusie Q a Susan

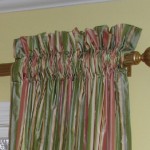
rod pocket panels

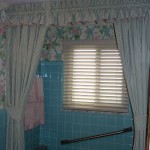
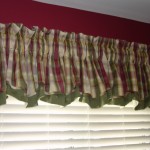
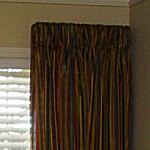
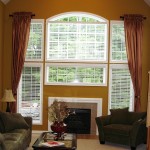
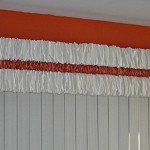
A rod pocket (also called a casing) is an easy window treatment, ideal for that beginner; a project for someone with a modest amount of sewing skills.
rod pocket, Zusie Q a Susan

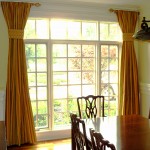
tripple rod pocket

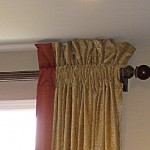
Turning the top of the curtain fabric down twice and then stitching it along the bottom fold create it.  The top hems are open at both ends so a curtain rod or pole can be inserted.  This is the most common way to hang curtains, café curtains and valances.

A rod pocket can lay flush against the rod, or it can have a ruffle, typically 2 to 4 inches deep.
rod pocket, Zusie Q a Susan

rod pocket with wide ruffle

rod pocket, Zusie Q a Susan

rod pocket with top and bottom header

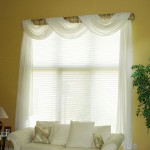
The curtains may be either unlined or lined.  Sheers and other unlined curtains are more light and airy than curtains that are lined.  However, lining adds extra body to curtains, giving them the look and drape of custom window treatments.  A heading is the portion at the top of a rod pocket curtain that forms a ruffle when the curtain is on the rod.  The width of the heading is the distance from the top of the finished curtain to the top of the stitching line of the rod pocket.
rod pocket, Zusie Q a Susan

rod pocket with swags

The materials you will need include fabric, chalk or fabric marker, thread, scissors, pins, a measuring tape and an iron.

Before you begin to sew, decide where you want the window treatment to be, and install the rod.  Measure from the top of the rod to where you want the lower edge of the curtain.   This is what the finished length of the curtain will measure.

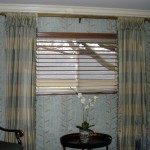
Trim off all the selvages from the fabric panels before you begin, as these tend to shrink and distort your finished project.   The fabric for your curtain should measure two and a half to three times the desired finished width   You may need to sew more than one width of fabric together depending on the size of your window.
rod pocket, Zusie Q a Susan

rod pocket with ruffle


rod pocket, Zusie Q a Susan

rod pocket with header

rod pocket, Zusie Q a Susan

wide rod pocket

Add 14 inches to the finished length of your curtain for the hem and the rod pocket.

We are going to use a 4 inch double-fold hem which is often used for decorator fabrics and for this practice example we are using a 3 inch double-fold heading for the rod pocket.   When making your own curtains the rod pocket must be large enough to accommodate the rod or pole comfortably and to allow the curtain to gather on the rod.

rod pocket, Zusie Q a Susan

rod pocket with wide ruffle


rod pocket, Zusie Q a Susan

rod pocket with header

rod pocket, Zusie Q a Susan

rod pocket with header

First mark and cut out the fabric.  If there’s more than one width, lay them together, right sides facing, pin them in place and join them using straight stitches.  Press the seams open.  For a well tailored look, your curtain should have neat, even hems.  Pressing is an important step.  Turn under 4 inches along the bottom, press, then 4 more inches for a double hem.  Press and then sew along the second folded edge.  Turn under 1.5 inches along both sides, press, then 1.5 more inches for a double side hem.  Press and then sew along the folded edges.

rod pocket, Zusie Q a Susan

rod pocket swags

To finish the upper edge of the curtain, turn under 3 inches along the top, press, then 3 more inches for a double heading allowance.  Press again and then sew along the folded edge.

Now all you have to do is insert the curtain rod into the top pocket and gather.

A heading is the portion at the top of a rod pocket curtain that forms a ruffle when the curtain is on the rod.  The width of the heading is the distance from the top of the finished curtain to the top of the stitching line of the rod pocket.

With these warm lazy summer days upon us, many people are looking out their back windows at their patios and decks for that outdoor living room.  A place for some enthused decorating, a quiet spot for your summer read, a comfortable recluse or a gathering place for fun, food and friendship.  Just like an indoor room, your patio or deck can be comfortable as well as intimate.  Treat it as an integral part of your home, an extension if you will.

Fireplaces or pits are all the rage as are gas grills and outdoor kitchens with cooking surfaces that rival the finest kitchens.  You can add “walls” with a trellis or colorful flowerpots; perhaps a weatherproof screen or a reclaimed garden gate.  Use colorful umbrellas for those sunny spots.  Bring indoor elements such as drapes, pillows, mirrors, baskets and lanterns outside.  Purchase an outdoor rug or better yet faux paint your own on a patio floor using stencils.

Decorate with a casual and comfortable feel; surround yourself with items you love.  There is such a wide variety of patio furniture available with gorgeous indoor/outdoor fabrics to choose from.  You can also visit flea markets and resale shops to find inexpensive furniture to paint and/or repurpose.  There is a wide spectrum of spray paints available for multi surfaces, including plastic furniture that you could paint without the need to prime, bringing in colorful pieces to your outdoor rooms.  Color and texture are very important in your outdoor room. They cross the threshold of the window sill and help bring the outdoors into casual, livable spaces.  Accessorize with garden fresh colors full of contrast and surprise as well as wicker, stone, wood and fabrics.  You can easily add mood lighting by reusing Christmas lights, solar lanterns and candles.

Whatever you do, make the space your own, a place to lounge with family and friends, to listen to the sound of nature and be sure that the environment allows for relaxation and enjoyment.

before

before

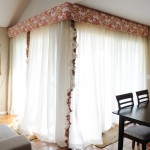
A custom shaped cornice was built and hung at the ceiling in this bay window eliminating the gap above the molding for a clean and tidy look.   The gentle curves add softness to this upholstered piece giving this modern more contemporary window treatment a traditional touch.  The bottom edge was trimmed with a coordinating cording.  Each of the three pieces were hinged together at the back for a uniformed look.

custom cornice, Zusie Q a Susan

after


flat valance with jabots, Zusie Q a Susan

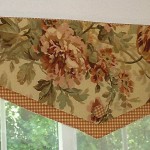
flat valance with jabots

With so many windows,
yet a beautiful view of the backyard and the lake beyond,
no privacy was needed but sun control was a must.

There were blinds in each of the windows for sun control,
which were not very attractive on their own.
With plenty of room above each window
this valance was hung more than a foot above the window frame.
They not only hide the blinds when not in use
but give the illusion that the windows are much taller than they actually are.

The jabots are lined in a deep luxurious red faux silk
to pick up the red accents of the kitchen but just a hint of the color peeks thru so as not to overpower the treatment.

Related Posts Plugin for WordPress, Blogger...