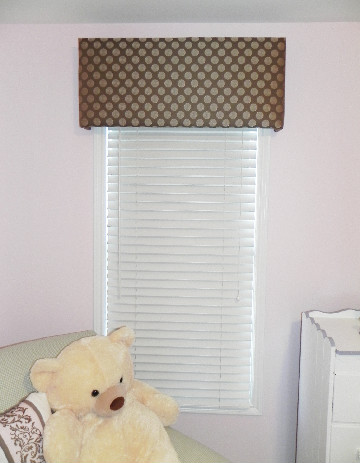
Many of you are interested in cornice boards and there is no need to be intimidated by them. I’m going to show you an easy DIY weekend project that requires no sewing and basic carpentry skills that anyone can do. I’ve built a cornice for this project that measures 38″ wide X 16″ long. It has a depth of 3.5″.

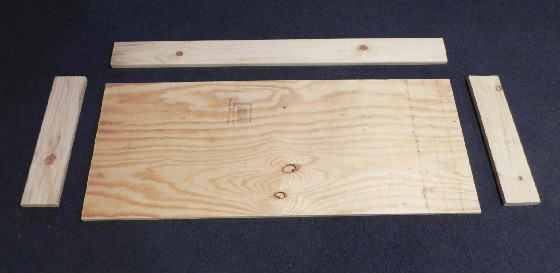
Your local big box store such as Home Depot will do all the cutting for you. For this project have them cut you a piece of 1/4″ plywood 16″ X 38″ and three pieces of 1″ x 4″ 38″, 15.25″, 15.25″. This is the body of your cornice.

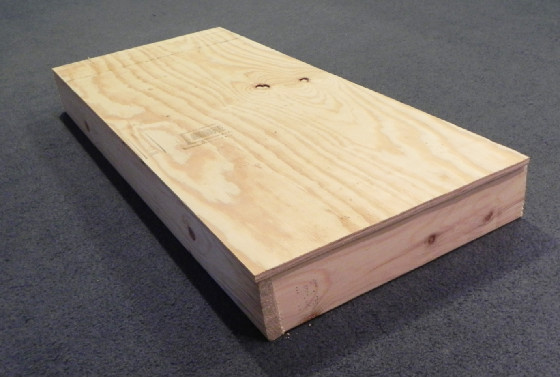
Now you have to assemble it and this is where your basic carpentry skills come in. Lay the 3 pieces of 1×4 onto a flat surface in the shape of your cornice and place the plywood on top of them.

Using your drill, first make pilot holes every 8 to 10 inches then insert screws to hold the wood in place. Pilot holes prevent the wood from splitting.

Make sure to screw down the top of the cornice to the sides to keep it tight and ridged. Congratulations, you’ve created your first wooden box.

Now cover the wooden box using a staple gun with two layers of 8 to 10 oz quilt batting. You can find this at your local fabric store such as JoAnn Fabrics.

The fun is about to begin. Cut a piece of fabric 27 inches long (I’m using 54″ drapery fabric). Lay it on a flat surface, place the cornice on top and staple the bottom edge. If you are using a patterned fabric make sure your pattern is straight along the bottom edge.

Next, wrap the fabric over the top, pull it snuggly and staple it along the top inside edge.

Staple the bottom along the sides as shown above.

Then pull the sides snuggly and staple them on the inside edge as shown.

Continue to staple the sides up to the top just like wrapping a gift.

Once this is done, cut a piece of lining slightly bigger that the inside of the cornice, fold and press all side in to fit the back of the cornice.

Place the lining on the inside of the cornice and staple it in place for a clean look.

Hot glue matching gimp along the bottom edge to cover the staples. Don’t worry about covering the staples along the sides or top of the cornice since these won’t be seen. Your cornice is now complete. All you have to do is hang it.

Measure and place 3″ L-bracket at the desired location

Place your finished cornice on the brackets and secure. That’s it, you’ve built your first cornice. Congratulations.


by Susan Dorbeck
Thanks for your timely response to my earlier question. My window is 38X66 what should the measurements be for the face of my cornice?
Regards
Kirti